Creating and Configuring Facebook Device
Scenario: You want to configure the Facebook device.
Reference: For background information, see the reference section.
Workflow diagram:
Prerequisites:
- A Facebook account is created and the MNS application is registered.
- System Manager is in Engineering mode.
- System Browser is in Management View.
Steps:
- Depending on where to add the driver, select one of the following:
- Project > Management System > Servers > Main Server > Drivers
- Project > Management System > FEPs > [FEP Station] > Drivers
- In the Object Configurator tab, click New
 and select New Facebook Driver.
a. In the New Object dialog box, enter a unique name and description.
b. Click OK.
- The Facebook driver displays under the Drivers node and is selected.
- In the Operation tab, navigate to the Driver Status property and click Start.
- The Facebook driver is created and started.
- In System Browser, select the Facebook driver and click the Driver Editor tab.
- Open the Driver Settings expander.
- A Description for the driver displays, however, you can enter a description.
- Open the Configuration Properties expander.
- In the Device Request Timeout field, enter 30000 (default is 10000).
- In the Check Status Rate field, enter 300000 (default is 30000).
- Open the Notification Integration expander.
- In the Batch Size field, set the value as 10 (default is 100). Batch size specifies the size in which the request is processed by the driver. The batch size displays the number of devices to which Notification interacts in one instant. For example, if there are 100 devices on which a message has to be displayed and a batch size of 10 is entered, Notification will send the message to batches of 10 devices each.
- In the Expected delivery Time field, enter the time in seconds. The default expected delivery time is 5 seconds.
NOTE: Notification does not guarantee the message delivery will be completed within the time entered in the Expected delivery Time field. This value is solely used to compute delivery statistics indicating whether message delivery to Facebook was on-time or late.
- Click Save
 .
.
- The parameters are configured for the Facebook driver.
- Select Project > Field Networks.
- The Object Configurator tab displays in the Primary pane.
- Click New and select New Facebook Account Field Network.
- In the New Object dialog box, enter a name and description.
- Click OK.
- The Facebook Account Field Network node appears under the Field Networks node.
- The Facebook driver is automatically associated to the field network. In the Network Editor tab, under the Network Settings expander, you can see that the values are preselected, and the driver is already assigned.
- Navigate to Project > Field Networks > Facebook Account Field Network.
- Click the Network Editor tab
- Click Create
 .
.
- In the New object dialog box, enter a name and description Name and Description.
- Click OK.
- In the Device Editor tab, proceed as follows:
a. In the Device Settings expander, enter a description.
b. Open the Configuration Properties expander.
c. Select Operational from the Device Mode drop-down list.
NOTE: The following options available in the Device Mode drop-down list:
Disabled: In this mode, the driver does not process the messaging command and/or the device configuration change command, but will perform status checks for the device. The device remains in a disconnected state.
Operational: In this mode, the driver processes the messaging command, the device configuration change command, and performs status checks for the device. The device will be inDisconnectedorConnectedstate.
Administrative: In this mode, the driver processes the device configuration change command and performs status checks for the device. The device will be inDisconnectedorConnectedstate.
- Click Save .
- The Facebook device is created.
An App Code is required for Notification to successfully communicate with the Facebook app. To aid in the generation of the App Code, Notification provides a Facebook Configuration Tool. This tool can be used to generate the required App Code. Listed below are the steps to generate the App Code and use the corresponding App Code with Notification.
NOTE: The generated App Code is valid for 10 minutes from its generation and can be used only once. The App Code has to be entered in the Application Code field in device settings detailed in the System Configuration (Field Network and Device) section within 10 minutes after the driver has been created. Otherwise, the steps have to be repeated to regenerate the App Code.
- On the Windows Start menu, search Facebook Configuration Tool.
- The Facebook App Access Code Generation tool starts. The already created Facebook devices are loaded in the Facebook Devices list.
NOTE: If the user creates new Facebook Devices when the Facebook App Access Code Generation tool is running then click Load Facebook Devices to refresh the Facebook Devices list.
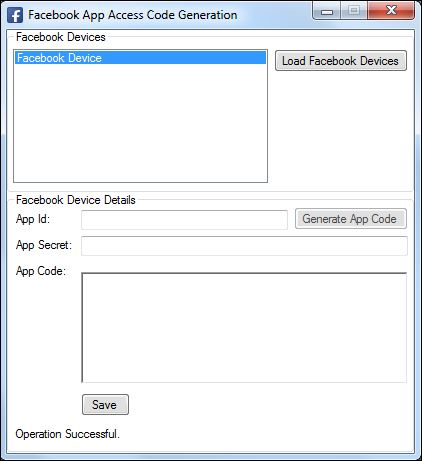
- Click Load Facebook Devices to load the available Facebook devices.
- Enter the application ID which was noted after creating the application in the Creating New App section.
- Enter the application secret which was noted after creating the application in the Creating New App section and click Generate App Code.
- The Facebook login page displays.
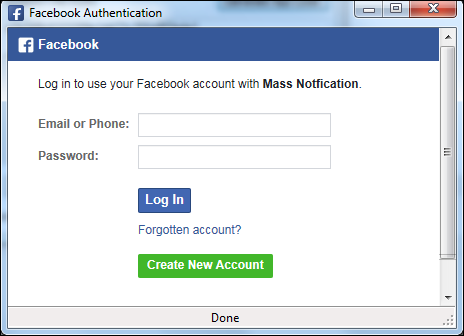
- Log into the Facebook account by providing the required credentials and click Log In.
- Follow the steps in the next window and complete accordingly.
NOTE: The required steps can vary depending on Facebook’s required authentication process. Hence, detailing every required step is beyond the scope of this document.
- Once successfully completed, the generated application code is filled in the tool as seen in the following image.
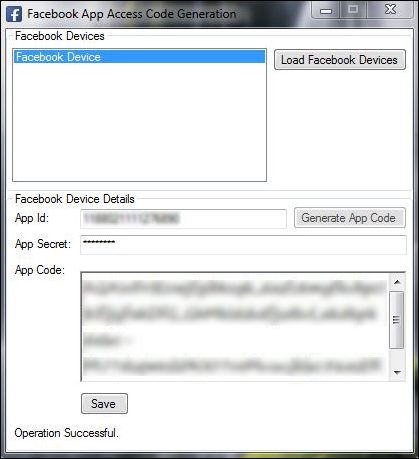
- Click Save.
NOTE: The Application Secret is stored in encrypted format for security reasons.
Next, you need to verify the devices and the drivers by creating a recipient device, linking the recipient device with the notification template which you eventually link to the incident template before initiating the incident using Command and Reaction.
To verify that the status was posted by the Facebook device, log in to the Facebook account and verify that the message text of the Notification Template created above is displayed as the status of the account.
- The device verification is completed