Object Configurator tabdisplays in the Primary pane.
Click New and select New Bulk Notification Driver.
In the New object dialog box that displays, do the following: a. Provide a unique text for the Description field by changing the default, if required. b. Click OK.
The Bulk Notification Driver is added to System Browser.
In the Operation tab navigate to the Driver Status property and click Start.
The Bulk Notification driver is created and started.
In the System Browser, select the Bulk Notification driver.
Click the Driver Editor tab.
In the Driver Settings expander, modify the description, if required.
In the Configuration Properties expander, proceed as follows:
In the Device Request Timeout field, enter 60000.(Default value is1000 ms)
In the Check Status Rate field, enter 300000. (Default value is3000 ms)
In the Notification Integration expander, proceed as follows:
In the Batch Size field,set the value as 10000 (default is 100). Batch size specifies the size in which the request is processed by the driver. The batch size displays the number of devices to which Notification interacts in one instant. For example, if there are 100 devices on which a message has to be displayed and a batch size of 10 is entered, Notification will send the message to batches of 10 devices each.
In the ExpectedDeliveryTime field, enter the time in seconds. The default expected delivery time is 5 seconds. NOTE 1:Notification does not guarantee the message delivery will be completed within the time entered in the ExpectedDeliveryTime field. This value is solely used to compute delivery statistics indicating whether message delivery to the Bulk Notification server was on-time or late. NOTE 2: On-Time or Late displays are based on the time taken for Notification to deliver the message to the Bulk Notification server and not the time taken to deliver the message to the actual recipient.
ClickSave.
The parameters are configured for the Bulk Notification driver.
The Object Configurator tab displays in the Primary pane.
Click New and select New Bulk Notification Server Field Network.
In the New object dialog box that displays, proceed as follows: a. Enter a unique name and description. b. Click OK.
The New Bulk Notification Server Field Network node appears in the fieldnetworks hierarchy and is selected by default.
The Bulk Notification driver is automatically associated to the field network. In the Network Editor tab, under the Network Settings expander, you can see that the values are preselected, and the driver is already assigned.
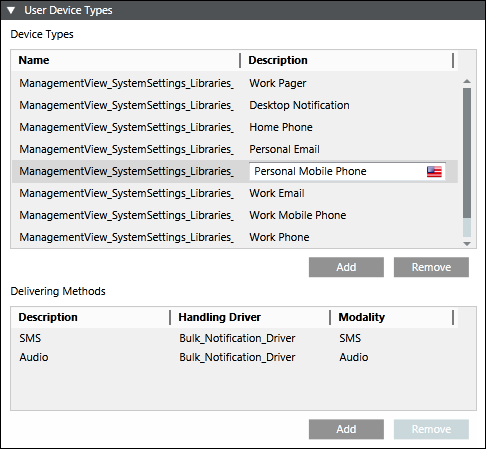
The list of default user device types displays under Device Types.
Under Description, select Home Phone, Personal Email, Personal Mobile Phone, Work Email, Work Mobile Phone, or Work Phone.
The list of delivery methods associated with the selected description displays under DeliveringMethods.
Edit the Description field.
From HandlingDriver drop-down list, select Bulk Notification driver if it was not automatically selected.
From Modality drop-down list, select SMS, Email, or Audio based on the description specified under Description. NOTE: For example, for Text, select SMS or Email and for Audio select Audio.
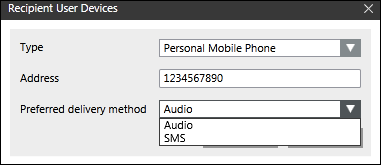
Add one or more users as recipients into Notification who use Home Phone or Personal Email or Personal Mobile Phone or Work Email or Work Mobile Phone or Work Phone as a recipient device.
From the Type drop-down list, select Home Phone or Personal Email or Personal Mobile Phone or Work Email or Work Mobile Phone or Work Phone.
In the Address field, enter the address.
The Preferreddelivery method field is automatically populated with the options available for the corresponding selection.
The users in the message template receives an email, phone call or an SMS text message with the content as described in the corresponding message template. The received message depends on what is set up in the message template.
 and select New Bulk Notification Driver.
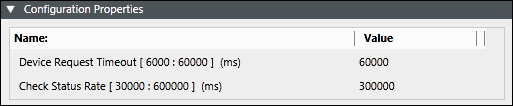
 .
. and select New Bulk Notification Server Field Network.
 .
.
 .
.