BACnet Network
In this section, topics are included to help you add and configure a BACnet network.
Complete the following procedures as needed:
Adding a BACnet Network
- System Manager is in Engineering mode.
- In System Browser, select Management View.
- Select Project > Field Networks.
- Click the Object Configurator tab.
- Click New
 , and select New BACnet Network.
- In the New Object dialog box, enter the Name and the Description.
- Click OK.
Assigning a Driver to the BACnet Network
- System Manager is in Engineering mode.
- A BACnet network has been created.
- In System Browser, select Management View.
- Select Project > Field Networks > [network name].
- Click the BACnet tab and open the Network Setting expander.
- From the drop-down list, select the driver.
- Click Save
 .
.
Monitoring Auto Discovery Progress
- System Manager is in Engineering mode.
- You have run discovery in the Discovery tab, and you want to monitor the progress in the BACnet tab.
- Select Project > Field Networks.
- Select the BACnet network with the devices that are being discovered.
- Select the BACnet tab.
- Click the Auto Discovery Progress expander to view the progress.
Configuring Block Commands Behavior
The configuration of block commands automatically generates block command macros for any fire network where this behavior is enabled.
- You have reviewed the Block Commands Programming and System Behavior table in the BACnet Network Reference topic.
- The BACnet network is selected in System Browser.
- Expand Block Commands Behavior.
- Check the commands you want to enable.
- Click Save .
Related Topics
Block Command Macros
Creating Global Objects Folder Mapping
- You have read the Global Objects Folder Mapping Reference topic.
- System Manager is in Engineering mode.
- Your subsystem supports global objects.
- In System Browser, select Logical View.
- Select the Views tab.
- Select the object hierarchy where you want to create the global object folder.
- Click Add Aggregator and select Aggregator.
- In the Create New Object dialog box, type the following:
- Names: GlobalObjects
- Description: Global Objects
- Click OK.
- Click Save .
- In System Browser, select Management View.
- Select Desigo CC > Field Networks > [network name].
- Select the BACnet tab.
- Expand Global Objects Folder Mapping.
- In System Browser, select Logical View.
- Select Logical View > [network name] > [Global Objects folder].
- Drag the root node for global objects to the text box in the Global Objects Folder Mapping expander.
- Click Save .
Related Topics
Global Objects Folder Mapping Reference
Deleting a BACnet Network
- System Manager is in Engineering mode.
- In System Browser, select Management View.
- Select > Project > Field Networks.
- Select the BACnet network you want to delete.
- Click the BACnet tab.
- Click Delete
 .
.
- A confirmation message displays asking if you want to remove the selected item.
- Click Yes.
- The object is removed from System Browser.
Copying and Deleting Notification Class Recipients
- System Manager is in Engineering mode.
- In System Browser, select Management View.
- Select > Project > Field Networks.
- Select the BACnet network you want to delete recipients from or copy recipients to.
- Click the BACnet tab.
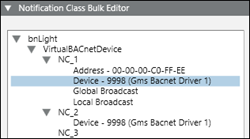
- Click the Notification Class Bulk Editor expander.
NOTE: To open the Recipient Selection Tree in collapsed form, click SHIFT + the expander.
- The management station finds and displays devices with notification class recipients on the BACnet network.
- In the Recipient Selection Tree, select a recipient.
- Do one of the following:
- To delete a recipient from a location (notification class), click Delete From, select the desired notification classes, and then click Delete.
- To copy a recipient to a location (notification class), click Copy To, select the desired notification classes, and then click Copy.
- Recipients are either deleted from or copied to the selected notification classes and appear in the Recipient Selection Tree.